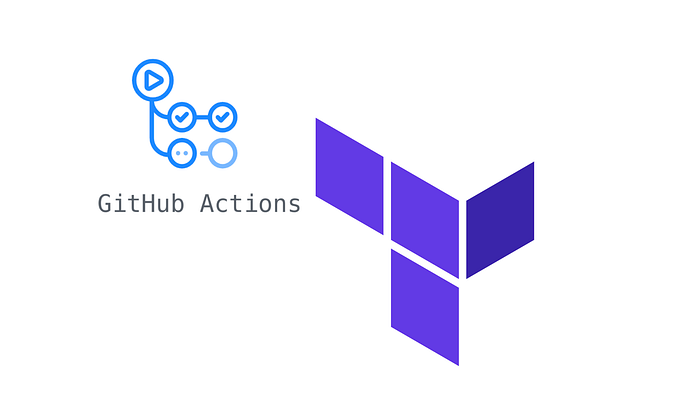
Automate chores with GitHub Actions
How I keep my Heroku web-app’s data up-to-date automatically
Scientists, open source developers, and basically probably most people, have to deal with one common obstacle in life: lack of funds to do all the stuff.

In particular in science and open source software, we cannot be bothered to maintain the stuff we left behind (at least, not on the boss’s time). It’s a never-ending quest towards novelty. People just tend to be more forthcoming in the wallet area when fancy new features or knowledge are promised.
This is why it is vital that we automate the crap out of everything we humanly can, especially if what we built is some kind of service.
A few months ago, I launched a small web-app called Coalitiewijzer. It uses data from Peilingwijzer (which combines major political polls into one) that is updated in irregular intervals. So you guessed it: we’re going to automate the ingestion of that data into the Coalitiewijzer.
In this short post, I’ll show you how I did this using GitHub Actions. GitHub Actions is a Continuous Integration (CI) provider that (obviously) integrates well with GitHub. If you want to know more about CI in general, I recommend checking out our Guide. I’ll assume some working knowledge on this and also on Git, GitHub and GitHub Actions themselves. For more background info about the app itself, check out my other blog post. This article is basically an add-on to that one. To sum up this article, we’ll look at four steps:
- Set up a basic GitHub Actions workflow that runs daily
- Update the data and commit to your Git repo
- Push this from a GitHub Actions runner back to the GitHub repo
- Deploy your app from GitHub Actions to Heroku
If you just want to take a shortcut straight to the code: here is the current GitHub Actions workflow file I wrote. For those who like to read poor prose instead: read on!
Daily running workflow
To start a new GitHub Actions workflow file, GitHub offers a convenient “New workflow” button under the Actions tab in your repo. You can also copy-paste the basic example in the Actions Quickstart guide.
These basic workflows typically only trigger on a push to your GitHub repo, as specified by the on: push line. We’ll want to change that into something like this:
on:
  schedule:
    - cron:  '0 17 * * *'  # 17:00 UTC
  workflow_dispatch:
The weird string between single quotes is cron syntax, which is explained in the docs. It allows you to specify at which times you want the workflow to run, in this case at 17:00. The timezone is UTC, keep that in mind.
The last line is actually unrelated, but quite useful nonetheless. It allows you to manually start the workflow from the Actions page, which I found to be essential wihle testing my workflow.
Updating the data
My app uses data from Peilingwijzer, which I preprocess for use in my app and then store in a pickle file. For details on this, see the update script on GitHub, or check out the blog post about the app. The pickle file has to be committed to the repo and then I can deploy to Heroku with the new data.
This can all be done with a shell script that looks roughly like this:
#!/usr/bin/env sh
set -e                    # make the script end on errors
python update_numbers.py  # download new data and dump to files
git add [the updated files]
git commit -m "updated data"
The Python script does the actual data downloading and mangling and dumps the results into files that the web-app uses. These are then committed to the repo.
To run this script (in particular the git commit), you do need to configure the git client on the GitHub Actions runner. You can do this with a workflow step at any time before running the commit command. Add this to your workflow job in the yml file:
- name: configure git user
  run: |
    git config --local user.email "${{ github.actor }}@users.noreply.github.com"
    git config --local user.name "${{ github.actor }}"
This commits under your own GitHub user name (or, in general, the username of the one that triggers the workflow to run), so it’ll identify the commits to be yours. It won’t do certification unless you also somehow configure that (perhaps using GitHub secrets, see the Heroku section below). You can fill in any name you want, though, so you could also put something like “Actions bot”.
Push back to your GitHub repo
One of the beauties of GitHub Actions is the great availability of … well, Actions. These are pre-baked recipes for steps that you can very conveniently plug and play. To be precise, you can add such a step to your job, which is part of your Actions pipeline.
For the next step, I needed to push the commit made above into the GitHub repo from within the GitHub (Actions) infrastructure itself. I was a bit anxious about whether I would find an Action which allowed me to do this. It feels like a potential security leak. Luckily, it turns out there is already an Action for this very task. Hurray! The Action’s source can easily be checked if you’re worried about security.
Just add the following step to your job after running the update script:
- name: Push changes
  uses: ad-m/github-push-action@v0.6.0
  with:
    github_token: ${{ secrets.GITHUB_TOKEN }}
    branch: ${{ github.ref }}
For this to work, one more step is necessary. You also need to add two options to your checkout step (at least, this is what I figure from the Action docs):
- uses: actions/checkout@v2
  with:
    persist-credentials: false
    fetch-depth: 0
That’s it!
Deploying to Heroku
Finally, after the data has been updated in the Git repo, the Coalitiewijzer app can be deployed back onto Heroku (which runs the app, live here). Heroku deployment can be done by just pushing your repo directly to the Heroku servers. Really convenient!
So, since this is again just a git push, albeit to a different repo, this should not be a problem. And, indeed, a Deploy to Heroku Action already exists for this very purpose!
To make this work, you need to add your Heroku API key to your GitHub repo’s secrets (instructions here). You can find the Heroku API key in your Heroku account. Call it HEROKU_API_KEY if you want the snippet below to work.
After that, you just add the action to your workflow job, like described in the action’s documentation (replace the boldfaced parts):
- uses: akhileshns/heroku-deploy@v3.10.9 # This is the action
  with:
      heroku_api_key: ${{secrets.HEROKU_API_KEY}}
      heroku_app_name: your_app_name_on_heroku
      heroku_email: your@email.address
Be careful with this key, because it gives access to your full Heroku account.
And that’s it! From now on, your updates will be pushed back to the GitHub repo and deployed on Heroku.
Of course, this is just one of many things you could automate using GitHub Actions. The combination with running actual servers on Heroku for free is icing on the cake. Of course, if you want more performance, more MBs, more connections, etcetera, you can pay them for that. But for low profile web-apps, the free package is really a great deal.
Let me know if you have any comments or questions. I’m happy to help!